- Home
- Essential Knots
- Clove Hitch
Mastering the Clove Hitch: Your Go-To Knot for Fenders & Mooring
In a Nutshell...
The clove hitch is a simple, versatile knot that every sailor should have in their toolkit. While it's not a secure choice for high-load applications, it's perfect for quick, non-critical tasks like temporarily attaching a line to a piling or securing fenders to your boat's stanchions. Its primary strength lies in its speed and ease of adjustment, making it a go-to knot for everyday use.
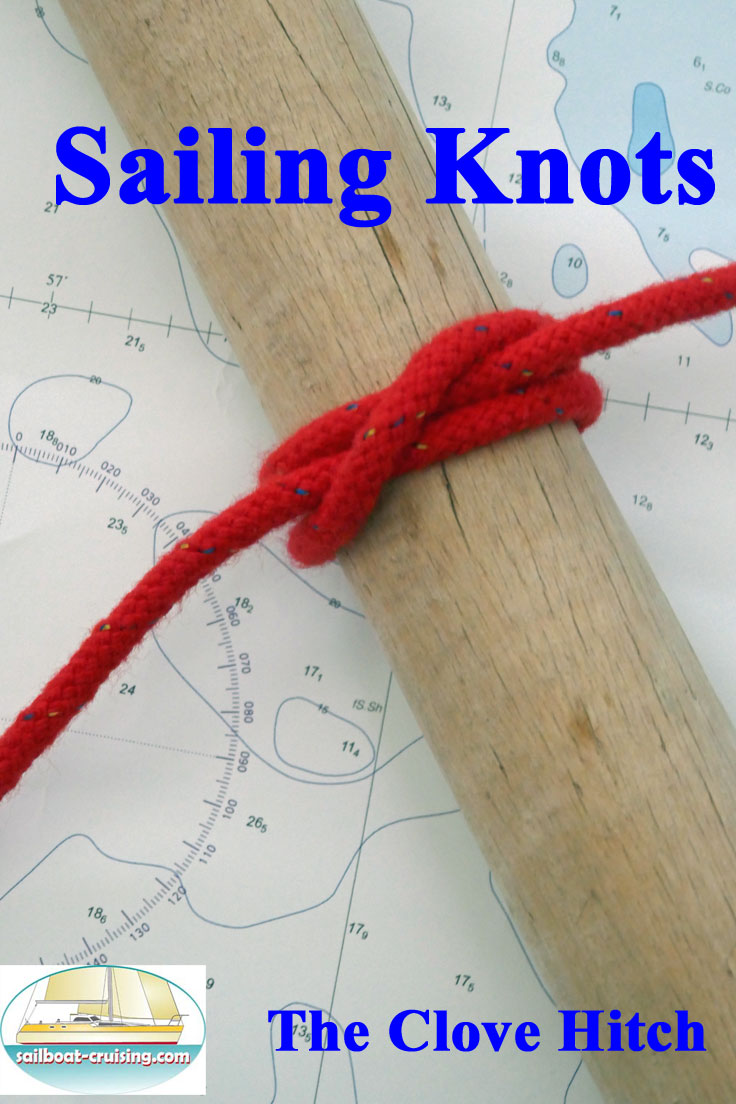
Table of Contents
The Clove Hitch & Why It's a Sailor's Best Friend
As an experienced offshore sailor, I’ve learned that a handful of reliable knots will get you through almost any situation on the water. Among them, the clove hitch stands out for its sheer utility. It's often misunderstood and sometimes gets a bad rap for slipping under heavy load, but that's like blaming a screwdriver for not being a hammer. When used correctly, for the right purpose, the clove hitch is a superstar.
I use this knot dozens of times a season, most often when tying on fenders before coming alongside a dock. The ability to quickly and easily adjust the height of a fender with a clove hitch is invaluable. It’s also my go-to for tying a quick temporary line to a piling while I sort out a more permanent mooring solution. It's a fast, efficient knot that gets the job done without fuss, which is exactly what you need when things are happening quickly on deck.
What is a Clove Hitch?
The clove hitch is essentially two turns around an object. It can be tied in two different ways: by creating two loops and slipping them over the post or by wrapping the line around the object twice. Its design allows it to be tied and untied with ease, and it’s very simple to adjust for tension and position.
How to Tie a Clove Hitch
There are a couple of methods for tying a clove hitch. Here’s a breakdown of the two most common approaches.
Method 1: The 'Overhand Loop' Method (Best for posts & pilings)
- Step 1: Wrap the end of your line around the post, crossing the standing part of the line.
- Step 2: Wrap the line around the post a second time, parallel to the first turn.
- Step 3: Tuck the working end under the second wrap, creating a second loop.
- Step 4: Pull both ends tight to secure the knot. This method is quick and straightforward when you're tying to an object with a free end.
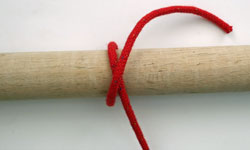
Stage 1
Make a turn with the working end passing over the standing part;
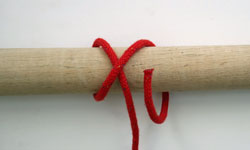
Stage 2
Make a second turn...
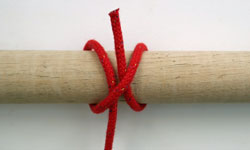
Stage 3
...passing the working end back under its own standing part.
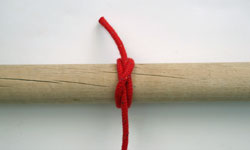
Stage 4
Finally, cinch the knot up tight. It's as simple as that - you've tied a Clove Hitch Knot.
Method 2: The 'Fender' Method (Perfect for stanchions)
This method is ideal for tying a fender to a stanchion or rail where you can't easily wrap the line around.
- Step 1: Create a loop in your line, with the working end on top of the standing part.
- Step 2: Create a second, identical loop.
- Step 3: Place the second loop on top of the first.
- Step 4: Slip both loops over the top of the stanchion or rail and pull the ends tight. The knot will form perfectly.
Best Uses for the Clove Hitch
- Fender Lines: This is arguably the most common use for a clove hitch on a sailboat. It allows for quick, easy adjustments to get the fenders at the perfect height.
- Temporary Mooring: For a brief tie-up to a dock or piling while you prepare your spring lines and bow and stern lines.
- Securing Tarp & Covers: It’s great for tying down a sail cover or a tarp over a cockpit, as it's easy to adjust for tension.
- Securing Lines: A clove hitch can be used to temporarily secure a line that is not under heavy tension.
The Clove Hitch & Its Limitations
It's crucial to understand when not to use a clove hitch. This is not a knot for critical applications. The knot can slip and loosen under heavy, cyclic loads. I would never use it to secure a primary mooring line or to tie up to a dock in a storm. For those situations, a bowline or cleat hitch is far more appropriate and secure. A clove hitch should always be backed up with two half hitches for added security if it will be left for an extended period or is under any kind of strain.
For a complete overview of knots and splicing, including their history and uses, return to our main article: A Sailor's Guide to Essential Knots & Splicing.
By Dick McClary, RYA Yachtmaster Offshore & member of the Yachting Journalists Association (YJA)
Frequently Asked Questions (FAQs)
Is a clove hitch a strong knot?
Is a clove hitch a strong knot?
No, the clove hitch is not considered a strong or secure knot for high-load applications. It can slip, especially under heavy or repeated strain.
Can I use a clove hitch for a main mooring line?
Can I use a clove hitch for a main mooring line?
No. You should never use a clove hitch for your main mooring or dock lines. Use a cleat hitch or bowline instead.
How do I make a clove hitch more secure?
How do I make a clove hitch more secure?
You can make a clove hitch more secure by adding two half hitches after the main knot.
Sources
Animated Knots by Grog: https://www.animatedknots.com/clove-hitch-knot RYA Seamanship Handbook: Information regarding the correct application and limitations of common sailing knots.
Recent Articles
-
Beneteau Oceanis 331 Clipper Review: Specs, Performance & Ratios
Feb 04, 26 07:25 PM
A comprehensive review of the Beneteau Oceanis 331 Clipper sailboat. We analyse design ratios, interior layout, and performance for prospective cruising owners. -
Self-Tacking Headsails: Track Systems vs Hoyt Jib Booms
Feb 03, 26 06:26 AM
Master the mechanics of self-tacking headsails. We compare traditional club-footed rigs, curved tracks, and the superior Hoyt Jib Boom for offshore sailing. -
Catalina 42 mk1 Review: Specs, Performance & Cruising Analysis
Feb 01, 26 06:35 AM
An in-depth review of the Catalina 42 mk1 sailboat. Explore technical specifications, design ratios, and practical cruising characteristics for this iconic cruiser.