A Sailor's Checklist: Inspecting & Maintaining Your Standing Rigging
Key Takeaways: A sound standing rigging inspection checklist is one of the cheapest forms of insurance you can carry aboard. Regular, methodical checks of the wires, rods, terminals, chainplates and tensioning of your rig catch problems while they are still a five-minute fix rather than a five-second catastrophe. The areas that matter most are broken strands and corrosion at swage terminals, cracking or movement at chainplates (both on deck and, crucially, below it), correct rig tension, and the fittings that most sailors never think to check until something has already gone wrong. A proper inspection happens at least once a season, again before and after any significant passage, and is backed up by a professional rigger's eye every three to five years.
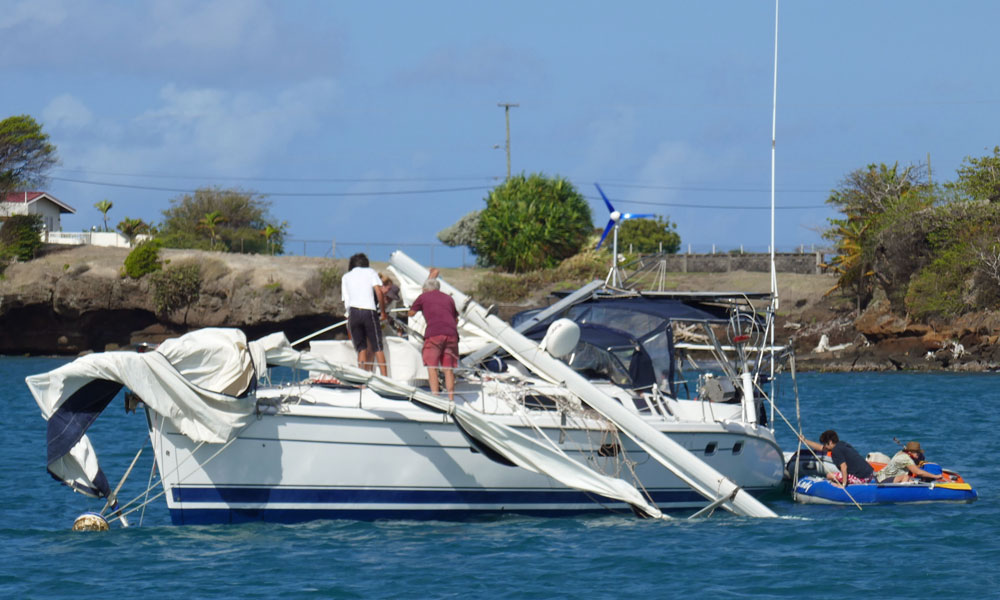 A comprehensive dismasting
Table of Contents
- Why Standing Rigging Deserves More Attention Than It Gets
- The Pre-Season & Post-Passage Inspection Routine
- Below-Deck Chainplate and Bulkhead Checks
- Maintaining Proper Rigging Tension
- Wire, Rod or Synthetic: What Your Material Means for Inspection
- Going Aloft Safely
- Common Causes of Dismasting and the Warning Signs
- What to Do If Your Rig Fails at Sea
- Insurance, Surveys and Knowing When to Replace
- The Importance of a Professional Rigger
- Summing Up
- Frequently Asked Questions
Why Standing Rigging Deserves More Attention Than It Gets
As an experienced offshore sailor, I've seen how a well-maintained rig can be the difference between a pleasant passage and a genuinely frightening one. The wires, rods and fittings that hold your mast up are working constantly, absorbing the shifting loads of wind, waves and your own manoeuvres, while also standing in a marine environment that is quietly trying to corrode them. Left unchecked, a small issue such as a single broken wire strand or a hairline crack in a swage terminal can progress to a full rig failure with very little warning. Think of standing rigging as your boat's skeleton: you would not set off on a long walk with a suspect knee, and you should not set off to sea without knowing the state of the structure holding your mast upright.
This guide is written for recreational sailors and boat owners who want a practical, actionable way to stay ahead of rigging problems, whether you are pottering along the coast or preparing for an ocean passage.
The Pre-Season & Post-Passage Inspection
My own routine starts with a thorough check before launching for the season, and a debrief once the boat is back on the hard. This is the best time to be methodical, without the pressure of a looming departure.
Start at the masthead and work down. Use binoculars to check the masthead fittings, sheaves and the top terminals of the standing rigging before you go anywhere near a bosun's chair. Look closely for broken wire strands, especially where the wire enters a swaged terminal: even a single broken strand is a genuine warning sign, not something to note and revisit later. Check every turnbuckle, toggle and fitting for rust or crevice corrosion, particularly where dissimilar metals meet, since that is where galvanic corrosion tends to start.
A swaged terminal should be smooth and even along its length. Any bulge, crack or distortion is a serious red flag and should be treated as such rather than monitored. If your boat uses rod rigging, check for cracking or bending at the terminals in particular, since rod fails differently from wire and often gives less visual warning beforehand.
Examine chainplates and stemhead fittings on deck for movement, cracking in the surrounding gelcoat, or weeping rust stains, all of which point to a problem developing underneath the visible surface. Make sure turnbuckles are lubricated and turn freely, and that every cotter pin or split ring is properly fitted and secure. A lost cotter pin can let a turnbuckle back off under load, which is a genuinely dangerous scenario that is entirely preventable with a five-minute check.
 A close inspection beats binoculars
Below-Deck Chainplate and Bulkhead Checks
This is the step most sailors skip, and it is arguably the most important one. Chainplates fail belowdecks far more often than on deck, because that is where they are hidden from oxygen, sealed against moisture, and often bolted to a bulkhead you never look behind. A chainplate can look perfectly clean and shiny where it is visible above the deck while the section running down through the deck structure has corroded almost completely away underneath.
Wherever possible, get access to the chainplate below deck, usually by removing a locker liner or a section of trim, and look for rust staining, water damage to the surrounding wood, or any sign of movement where the plate meets its backing structure. Tap the deck around each chainplate penetration with the handle of a screwdriver: a dull thud suggests a soft, possibly delaminated core, while a solid knock means the structure is sound. If a chainplate is fully encapsulated within a bulkhead with no way to inspect it visually, treat that as a design weakness rather than a reassurance, since a hidden leak can sit corroding the plate for years with no external sign until the moment it fails.
| Component | What to Check | Red Flag |
|---|---|---|
| Masthead fittings and sheaves | Alignment, wear, security of top terminals | Visible movement, worn sheave grooves, loose fasteners |
| Swage terminals | Smoothness, shape, broken strands at the entry point | Bulging, cracking, rust staining, any broken strand |
| Turnbuckles and cotter pins | Free movement, thread engagement, pin security | Seized threads, bent studs, missing or worn pins |
| Chainplates on deck | Movement, cracked gelcoat, staining around the plate | Weeping rust, lifting nonskid, visible flexing under load |
| Chainplates below deck | Corrosion, bulkhead condition, bolt integrity | Rust staining on wood, soft or delaminated bulkhead, pitting |
| Spreaders and spreader roots | Play at the mast end, even height, chafe from other rigging | Excess movement, cracks at the attachment, worn casting |
| Rig tension | Mast straightness, shroud slackness when tacking | Visible mast pumping, slack leeward shrouds, uneven tension |
Maintaining Proper Rigging Tension
Correct tension is a balancing act. Too loose, and the mast will pump while the leeward shrouds go slack, causing repeated fatigue loading every time the boat tacks. Too tight, and you place unnecessary stress on the entire rig, mast and hull structure.
Start with the shrouds: the mast should sit straight and centred, with the upper shrouds adjusted evenly to remove sag. Move on to the lowers and intermediates, which control the mast's fore-and-aft curve and matter a great deal for sail shape, since a small amount of pre-bend is often desirable but too much is not. A rig tension gauge, such as one from Loos & Co, gives you a repeatable baseline rather than relying on guesswork or feel. Record your settings in the boat's logbook so you have a reference point to return to season after season, and so any drift in tension over time becomes obvious rather than something you have to guess at from memory.
Bear in mind that the specific tension figures suitable for your boat depend on the mast section, rig configuration and sail plan, so treat any general numbers you read online as a starting point to be confirmed against your mast manufacturer's or rigger's tuning guide rather than a universal standard.
The Loos & Co tool is available from West Marine.
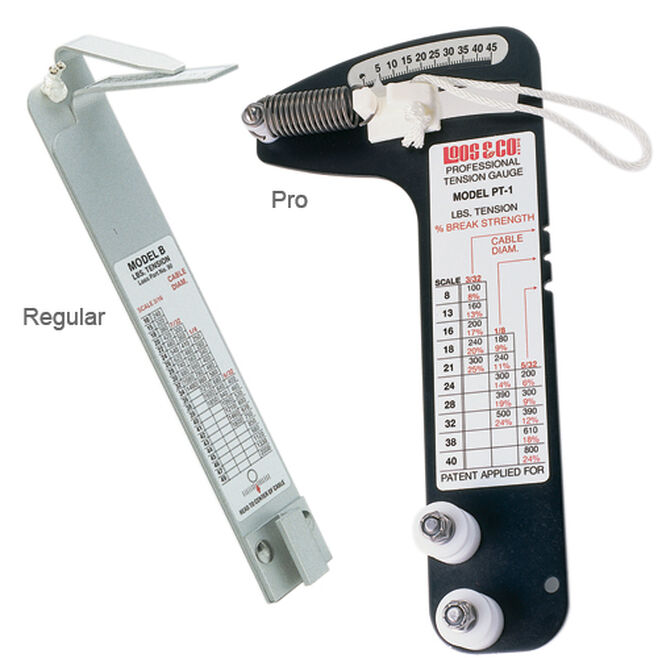
UK readers: You can also find the Loos & Co Rig Tension Tool at Gael Force Marine.
This page includes affiliate links. If you click through and buy something, I may earn a small commission at no extra cost to you. It helps support the site and keeps the information free for everyone.
Wire, Rod or Synthetic: What Your Material Means for Inspection
Most cruising boats still use 1x19 stainless steel wire, and for good reason: it is predictable, relatively affordable, and can be inspected and repaired almost anywhere in the world. Rod rigging, more common on performance and racing boats, offers less stretch and a cleaner aerodynamic profile, but it gives fewer visual warning signs before failure and generally needs a specialist to assess properly.
In recent years, synthetic rigging using Dyneema has become a genuine option for some cruising applications, particularly for runners, checkstays and lighter secondary rigging, thanks to its enormous strength-to-weight advantage and complete resistance to corrosion. For primary shrouds and forestays on a bluewater cruising boat, though, most experienced riggers still favour stainless wire, mainly because it can be repaired or replaced almost anywhere, while a damaged Dyneema splice needs specialist materials and expertise that are far harder to find in a remote anchorage. If you are weighing up which material actually suits your boat and sailing plans, our guide to Stainless Steel Wire vs Rod Rigging: Choosing the Right Material for Your Sailboat goes into the trade-offs in more depth, including lifespan, cost and how each material behaves under load.
Whichever material your boat carries, inspection frequency should not change: wire needs regular checks for broken strands and terminal corrosion, rod needs professional attention for hairline cracking, and synthetic rigging needs regular checks for chafe, UV degradation and any sign of creep or slippage at the terminations.
Going Aloft Safely
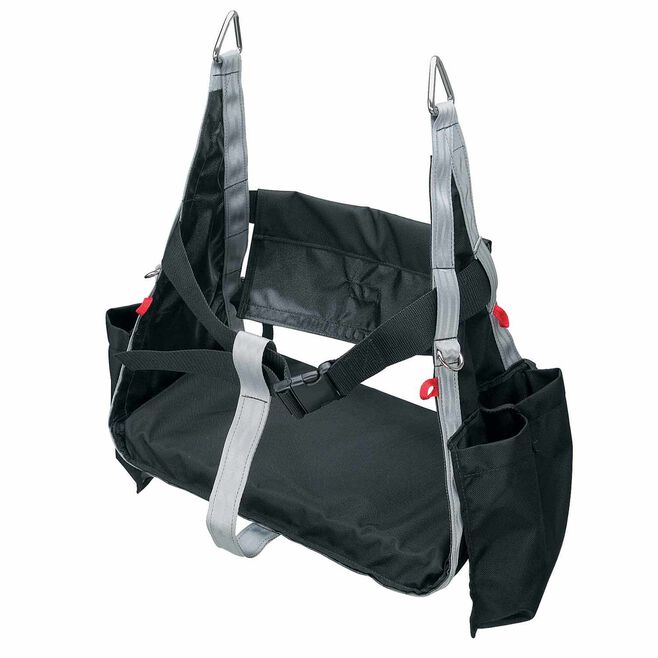
At some point, a proper inspection means going up the mast yourself, and this is worth taking seriously since it is one of the more dangerous routine jobs aboard. A bosun's chair with secure safety straps, a waist belt and crotch strap is the standard approach, and it should be tested with a bounce a short distance above the deck before you trust it with a full climb.
Always rig a second, independent halyard as a safety backup attached to your harness, with someone tending it to take up slack as you climb, even if your main means of ascent is mast steps or a mechanical ascender. Agree on clear signals with whoever is on deck before you start, since a shout of stop can mean very different things depending on the situation, and do not assume you will be able to hear each other clearly once you are aloft. Keep tools and small items secured in a bag rather than a pocket, since even something as light as a shackle can do real damage falling from height, and keep anyone not actively working the halyard clear of the mast base.
This page includes affiliate links. If you click through and buy something, I may earn a small commission at no extra cost to you. It helps support the site and keeps the information free for everyone.
Common Causes of Dismasting and the Warning Signs
A well-built, well-maintained rig will not collapse under normal conditions on its own. When rigs do fail, the cause is generally one of a short list: crevice corrosion inside a swage terminal or chainplate, metal fatigue in a component that has been cycling under load for years, a fitting that was already compromised by a manufacturing flaw, a clevis pin or cotter pin that has worked loose, or simple operator error such as carrying too much sail or forgetting to set a running backstay after a tack.
The uncomfortable truth is that some failures give almost no external warning. Internal fatigue in a below-deck tie rod or a hidden chainplate can develop over a decade with nothing visible from the outside, which is exactly why a professional survey that goes beyond a purely visual check matters as a rig ages, even when everything looks fine on deck. That said, most failures do provide some warning if you know what to look for: a shroud that has gone slightly slack compared with its opposite number, a turnbuckle that has stopped turning smoothly, a faint rust stain that was not there last season, or a slightly different sound from the rig under load.
What to Do If Your Rig Fails at Sea
If a shroud or stay does let go, the immediate priority is preventing further damage and protecting the crew. Get a spare halyard onto the mast as quickly as possible, leading it to a strong point to take the load the failed rigging was carrying, and ease sheets to reduce pressure on the rig while you assess the situation. If the mast itself has come down, the jagged broken end can quickly hole the topsides as the boat rolls, so fendering it away from the hull or cutting it free with bolt croppers, if you carry them, takes priority over trying to save the spar.
Once you are safely underway again, however that looks, keep a written record of what happened, what the conditions were, and what you observed, since this will matter a great deal if you need to make an insurance claim afterwards. Sailors who have been through a dismasting consistently report that the months of dealing with the insurance claim were more stressful than the failure itself, and that sticking to the facts without speculating about blame in early conversations with the insurer made the process considerably smoother.
Insurance, Surveys and Knowing When to Replace
Most riggers put the working lifespan of standing rigging at around ten years for a well-cruised boat in moderate conditions, though this is a guideline rather than a hard rule, and some insurers and surveyors apply their own age-based replacement schedules regardless of a rig's actual condition. If you are hesitating over whether your rigging needs replacing, it is worth remembering the sailor's rule of thumb about reefing: if you are already wondering whether it is time, it probably is.
A pre-purchase survey is not the same as a rigging survey, since most marine surveyors are not riggers and will not go aloft or dismantle fittings for a close inspection. If your insurer requires evidence of a rig's condition, or if your rigging is approaching or past the decade mark, a dedicated rigging inspection by a specialist is worth the cost, both for your safety and for a smoother claims process should something go wrong later.
The Importance of a Professional Rigger
While I firmly believe in a sailor's ability to carry out their own routine inspections, there is no substitute for a professional rigger's eye at regular intervals. I rely on a rigger for a comprehensive mast-up inspection every three to five years, and a full mast-down inspection every ten years, when the rig can be laid out and examined properly away from the boat. Riggers have the specialist knowledge and equipment to spot problems a layperson is likely to miss, including internal corrosion, hairline cracking in fittings, and the kind of hidden fatigue that no amount of careful visual inspection from the deck will ever reveal.
Summing Up
Standing rigging inspection is not a glamorous job, but it is one of the few maintenance tasks aboard where a small amount of regular attention genuinely prevents the worst outcomes. Work through the same checklist each season: masthead and terminals, chainplates above and below deck, tension, and the fittings that hold it all together, and back your own eyes up with a professional survey at sensible intervals as the rig ages. Do that consistently, and the rig that holds your mast up is far more likely to keep doing so exactly when you need it to.
This checklist is a helpful tool for sailors, but for a comprehensive overview of all aspects of sailboat rigging, you can return to our A-Z of Sailboat Rigging & Maintenance Guide.

This article was written by Dick McClary, RYA Yachtmaster and author of the RYA publications 'Offshore Sailing', member of The Yachting Journalists Association (YJA), erstwhile member of the Ocean Cruising Club (OCC) and owner/administrator of 'Liveaboard Sailboats for Sale'.

Frequently Asked Questions
How often should I inspect my standing rigging?
How often should I inspect my standing rigging?
A thorough inspection is recommended at the start of every sailing season and after any major passage or storm. A quick visual check should be part of your routine before every sail.
What is the most common cause of rigging failure?
What is the most common cause of rigging failure?
The most common causes are fatigue and corrosion, which often lead to a terminal or wire strand failure. Poor tensioning and improper installation can also contribute to premature failure.
Can I replace my own rigging?
Can I replace my own rigging?
Unless you have the correct tools, knowledge, and experience, it's best to leave major rigging replacement to a professional. Improperly installed rigging can be incredibly dangerous.
Resources Used
- North Sails - Rig Tuning Guide: https://www.northsails.com/sailing/2019/02/guide-to-rig-tuning
- Practical Sailor - Rigging Inspection: https://www.practicalsailor.com/maintenance/rigging-inspection-best-practices
- UK Sailmakers - Guide to Tuning: https://uksailmakers.com/uk-sailmakers-tuning-guide/
Recent Articles


-
Coastal Passage Planning Made Easy: A 5-Phase Prep Guide
Oct 24, 26 10:51 AM
Master short coastal passage planning with our 5-phase preparation system. Avoid dockside stress, set safe limits, and cast off with complete confidence. -
Nonsuch 30 Sailboat Review, Specs, Performance and Buying Guide
Oct 21, 26 05:45 PM
Independent Nonsuch 30 review covering specs, performance, Classic vs Ultra layouts, owner feedback, common faults and buying advice. -
Hallberg Rassy 42E Review, Specs & Buyer's Guide
Oct 21, 26 07:00 AM
Hallberg Rassy 42E review with specs, design ratios, sailing performance, ownership insights, common issues and buyer guidance.