- Home
- Rigging
- Standing Rigging Inspection Checklist
- How to Set Shroud Tension
Rig Tuning for Cruisers: A Step-by-Step Guide to Setting Shroud Tension
Key Takeaways: A cruising rig is tuned in two stages. First you tune at the dock: centre the mast, set the rake, then bring the cap shrouds and lowers up to a baseline tension with a gauge. Then you tune under sail, checking that the leeward shrouds stay taut when the boat is heeled and that the mast stays straight. The baseline most often quoted for a masthead cruising rig is about 10 to 15 percent of the wire's breaking load on the cap shrouds, with the lowers somewhat lower, and sources agree you should rarely go beyond 20 percent. But the sources don't all agree on the details, so your mast maker's tuning guide always comes first. Don't over-tighten, don't tune only once, and write your settings in the logbook.
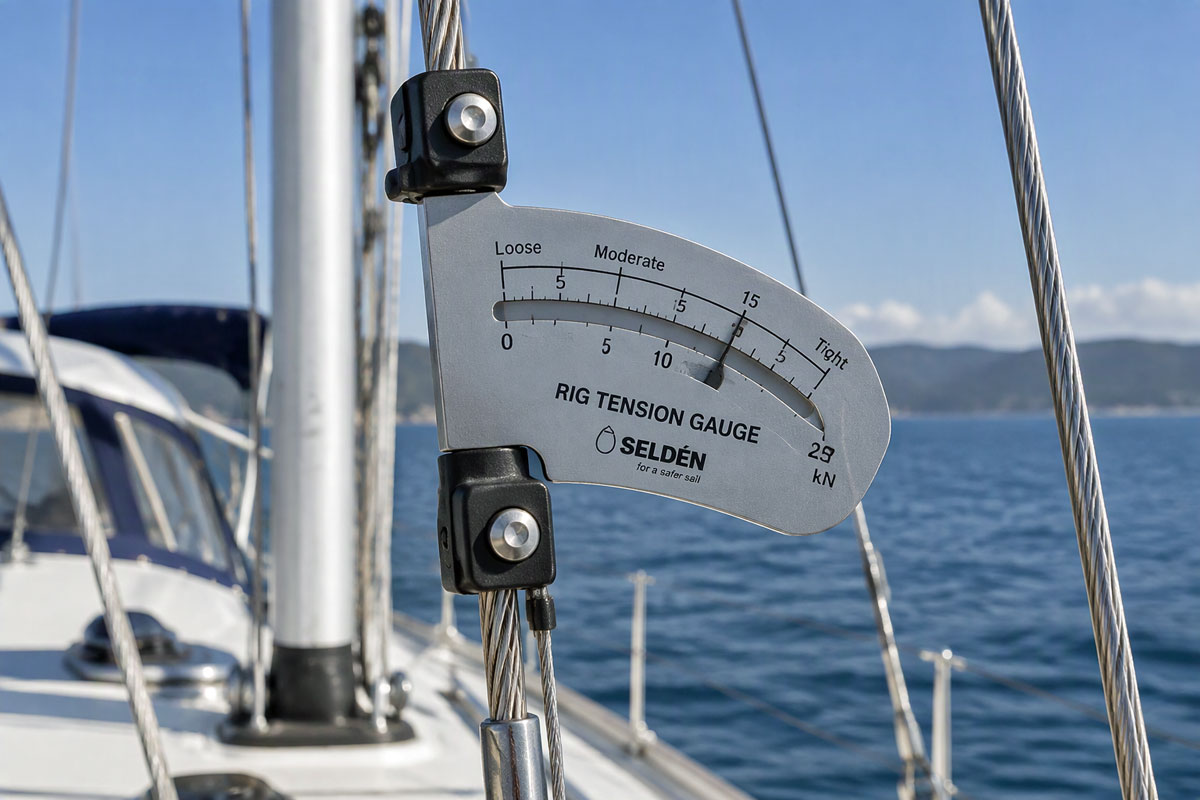 A tension gauge gives you a repeatable reading instead of guesswork
The method in this guide suits a continuous masthead rig; if your rig is discontinuous, with separate segments at each spreader, the order of adjustment and the tensions differ, so follow your mast maker's guide.
Many cruising boats sail for years with the rig set up once by the yard and never touched again. That's understandable, because tuning sounds like a racing skill. But for a cruiser it's mostly about safety and fatigue: a rig that's too loose pumps and shock-loads its fittings, and a rig that's too tight stresses everything from the mast to the hull. This guide takes you through the process step by step. It follows on from the tension advice in our main inspection guide, A Sailor's Checklist: Inspecting & Maintaining Your Standing Rigging, and for a broader look at the subject you can also read our mast tuning guide.
What Rig Tuning Is Trying to Achieve
Four things matter. The mast should be straight from side to side, in column, with no sideways bend or lean. The fore-and-aft rake should suit the boat, which is a design decision rather than a matter of taste. The leeward shrouds should not go slack when the boat is sailing hard on the wind. And the tension overall should be high enough to control the rig but no higher, because every extra pound is loading the mast, the chainplates and the hull.
Before You Start: Tools, Conditions and Wire Facts
Pick a calm day with little wind and flat water, with the boat afloat and reasonably level. Then gather what you need.
| Item | Why You Need It |
|---|---|
| Rig tension gauge, matched to your wire size | Gives repeatable readings on each shroud, so port and starboard match |
| Wire diameter, construction and breaking load | Gauge readings convert to a percentage of breaking load only if you know what wire you have |
| Mast maker's or rigger's tuning guide | Sets the figures for your mast section, rig type and sail plan; overrides general advice |
| Main halyard and a tape measure | Lets you measure from the masthead to each chainplate to check the mast is centred |
| Spare cotter pins, split rings and tape | Turnbuckles must be locked and pinned after every adjustment |
| Logbook or notebook | Records gauge readings and turns so you can see drift and repeat the setting |
A word on the wire figures, because this catches out many owners. Gauges give you a reading that converts to a tension, and the tension only means something as a percentage of the wire's breaking load. Published breaking-load tables for the same nominal wire size can differ noticeably between sources, so confirm the figure for your wire with your rigger or the wire supplier before you start.
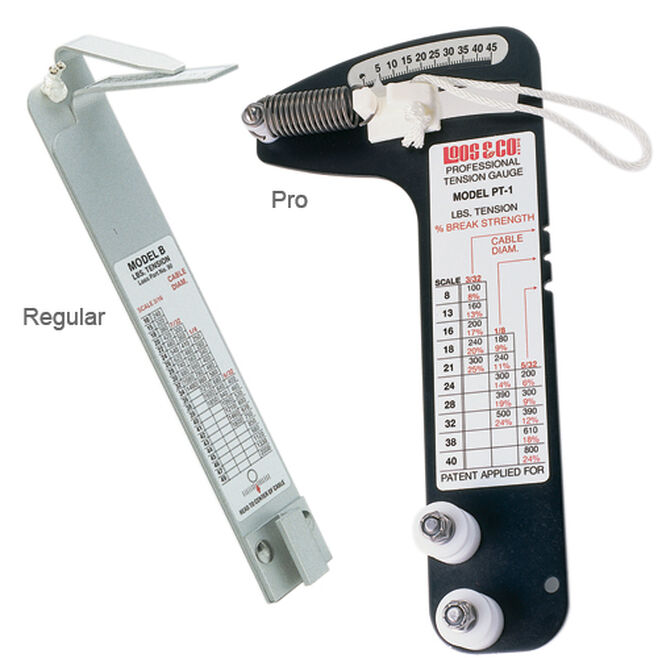
UK readers: You can also find the Loos & Co Rig Tension Tool at Gael Force Marine.
This page includes affiliate links. If you click through and buy something, I may earn a small commission at no extra cost to you. It helps support the site and keeps the information free for everyone.
Continuous or Discontinuous Rigging: Why the Method Differs
Before you touch a turnbuckle, find out which type of rigging you have. On a continuous rig, each shroud runs in one piece from the deck to the mast, passing the spreaders. On a discontinuous rig, the shrouds are broken into separate segments that terminate at each spreader tip, usually numbered V1, V2 and so on for the verticals and D1, D2 and so on for the diagonals, working up from the deck. Small wire rigs are usually continuous, while larger and performance rigs, especially those with rod, are often discontinuous. Terminology varies between makers, so check your rigging plan.
This changes how you tune. Segments in a discontinuous rig interact: tensioning the verticals loads the diagonals, so makers advise leaving the diagonals very loose first, then working up from the lowest panels and rechecking that the mast is centred and straight after each adjustment. The sequence in this article suits a continuous masthead rig, so for a discontinuous rig follow your mast maker's tuning guide for the order, the pre-bend figure and the tension of each segment.
| Feature | Continuous Rigging | Discontinuous Rigging |
|---|---|---|
| Construction | Each shroud runs in one piece from deck to mast, past the spreaders | Segments terminate at each spreader tip (V1, V2, D1, D2 and so on) |
| Typical use | Smaller rigs and many cruising boats with wire | Larger and performance rigs, often with rod |
| Tuning order | Centre the mast with the cap shrouds, then bring in the lowers to straighten it | Leave the diagonals very loose, tension the verticals first, then work up through the diagonals |
| Interaction | Lowers and caps are separate wires, but all share the mast column | Adjusting one segment changes the others; recheck centring after every step |
| Tension targets | Percentage of breaking load for each wire; starting ranges in this article apply | Each segment may be a different size, so use the maker's figures for every segment |
| Inspection | Fewer terminations along the rig | More terminals and tip cups to inspect at each spreader |
The Numbers: What Tension Should You Aim For?
This is where advice varies most, so here is the range of figures that experienced riggers quote, expressed as a percentage of the wire's breaking load. Treat them as a starting point, not a standard.
| Part of the Rig | Commonly Quoted Starting Point | Notes |
|---|---|---|
| Cap (upper) shrouds | About 10 to 15 percent of breaking load | Some guides suggest 10 to 12 percent for masthead sloops; Nigel Calder's widely quoted figure is 15 percent; fractional rigs with swept-back spreaders may need more to keep the forestay tight |
| Intermediates and lowers | Somewhat less than the cap shrouds, often around 10 percent | Lowers are shorter and carry less load; the gauge maker's instructions suggest forward lowers can be tighter than aft lowers |
| Backstay | Commonly quoted at around 20 percent | Backstay tension also sets forestay sag, so adjust it together with rake |
| Upper limit | Rarely above 20 percent; some sources say never above 25 | Over-tight rigs load the mast, spreaders, chainplates and hull; over-tight lowers can overload the upper spreaders |
Step-by-Step: Tuning at the Dock
This sequence is the one most guides follow for a keel-stepped or deck-stepped continuous masthead rig. If your rig is discontinuous, use your maker's guide for the order instead. Riggers do disagree about some of the detail, for example whether to start with the uppers or the lowers, so follow your maker's guide if it differs.
- Slacken and centre. Start with the rig loose and make sure the mast is centred where it passes through the deck and sits on its step.
- Centre the masthead. Hand-tighten the cap shrouds so the mast is upright when viewed from ahead or astern. Shackle a tape to the main halyard, hoist it to the masthead, and measure to the same point on each chainplate. Adjust the turnbuckles until the measurements are equal.
- Set the rake. Use the forestay and backstay to set the mast rake to the designer's or sailmaker's figure.
- Tension the cap shrouds. Use the gauge to bring both cap shrouds to your target, working alternately from side to side. Re-measure to make sure the masthead hasn't moved off centre.
- Tension the intermediates and lowers. Take up the intermediates and lowers evenly on each side, sighting up the aft face of the mast or its track as you go to make sure it stays straight. Bring them up to a lower percentage than the caps.
- Set the backstay. Adjust the backstay and re-check that the mast is still centred and straight.
- Lock and record. Fit a correctly sized split pin through every clevis pin and turnbuckle body, bend the legs back so they stay within the profile of the fitting, and cover the ends with tape. Write down every gauge reading and the number of turns you made.
Step-by-Step: Tuning Under Sail
A dock tune is only a baseline. The test comes when the rig is loaded, so sail upwind in a moderate breeze and look at the leeward side. Yachting press guidance is that with proper tension the leeward cap shrouds should remain taut at about 15 degrees of heel. If they're slack, the rig is too loose. Tack and check the other side as well.
| What You See | Likely Cause | What to Try |
|---|---|---|
| Leeward cap shroud goes slack at about 15 degrees of heel | Cap shrouds too loose | Add tension in small, equal steps on both sides, then recheck under sail |
| Mast bends sideways between spreaders when sailing | Intermediates or lowers unevenly set | Sight up the mast and adjust the lowers or intermediates evenly on each side |
| Mast pumps, or the forestay sags badly | Rig too loose overall, or insufficient backstay tension | Check cap and lower tension, then backstay; avoid making big changes at once |
| Spreader tips push up or look overloaded | Lowers set too tight | Ease the lowers and re-check the spreaders and mast straightness |
| Gauge readings differ port and starboard | Mast off-centre or uneven adjustment | Re-centre the masthead with the halyard measurement and rebalance the readings |
| Mast bends fore and aft in a way you can't straighten | Compression bend from over-tight lowers or a mis-set backstay | Ease the lowers, re-check the rake, and ask a rigger if it persists |
Make changes in small steps and change one thing at a time. It's very easy to induce a compression bend in the mast and then spend an afternoon trying to tune it out.
Split Pins or Split Rings?
Many riggers and experienced owners prefer split pins (called cotter pins in the US) to split rings for securing clevis pins and turnbuckle bodies. A correctly sized split pin can't work its way round and off, whereas a ring can be caught by a sheet, deformed and pulled out, or gradually work loose. The trade-off is that split pins have sharp ends that snag sails and skin, they need pliers to fit and remove, and the usual cure, taping, needs checking because tape can hold water against the fitting.
I prefer split pins on critical clevis pins such as those at the shroud, forestay and backstay terminals. If you do use rings, choose large stainless split rings with straight sections rather than curled-end cotter rings, fit them on the outboard side where sheets can't rub them, and check them often.
| Factor | Split Pins (Cotter Pins) | Split Rings |
|---|---|---|
| Security | High when correctly sized and bent back | Lower: can be deformed by a sheet, pulled out or work off |
| Snagging | Sharp ends snag sails and skin unless folded back and taped | Smoother, but can still catch a line |
| Fitting and removal | Need pliers; replace the pin after removing it | Can be fitted and removed by hand or with small pliers |
| Inspection | Easy to see; check the condition of any tape | Easily missed; check often, and fit outboard so they are visible |
| Best suited to | Critical clevis pins and turnbuckle bodies on standing rigging | Lifelines and lower-load fittings, if checked regularly |
Common Mistakes
The same few errors come up again and again. Tuning to a percentage without knowing the wire's actual breaking load is one. Over-tightening in the belief that tighter is safer is another, when in fact it loads the mast, spreaders and chainplates. Tuning only once, or only at the dock, means you never see how the rig behaves under load. And forgetting to lock the turnbuckles and log the settings means any drift goes unnoticed. If your gauge readings keep changing between checks, that's information too, and it's worth a look at the fittings and chainplates, as covered in our guide to inspecting hidden chainplates.
How Often to Re-Tune, and What to Log
Don't set the rig up once and leave it alone. Check the tension after stepping the mast, after your first few sails, after sailing in heavy weather, and at the start of each season, since temperature swings and stretch change tension over time. Record the date, gauge readings for each shroud, the number of turns you made and the conditions. Over the years, that log will show you drift in the rig, and the next person to tune it will thank you.
When to Call a Rigger
Many cruisers are happy to do a straightforward masthead tune themselves. Call a rigger if your rig is unusual, such as a fractional rig with swept-back spreaders, a bendy mast with adjustable runners, or a rig with several sets of intermediates. Also call one if the rig is old, if you find damage while tuning, or if the mast won't come into column however you adjust it. Tuning is a good moment to inspect, so look at the terminals, turnbuckles and toggles as you work, and consider whether the age of the rig is a factor, as covered in How Long Does Standing Rigging Last? Age, Sea Miles and the Insurer's Rule.
Summing Up
Tuning a cruising rig isn't a dark art. Centre the mast, set the rake, bring the cap shrouds and lowers up to a baseline with a gauge, then go sailing and check that the leeward shrouds stay taut and the mast stays straight. Quoted tensions cluster around 10 to 15 percent of breaking load on the caps, with the lowers a little lower and 20 percent rarely exceeded, but your mast maker's guide has the final say. Change one thing at a time, lock the turnbuckles, and log your settings so you can see what changes. If the rig is complicated or old, a rigger is money well spent.
Frequently Asked Questions
How tight should my shrouds be?
How tight should my shrouds be?
For a masthead cruising rig, commonly quoted starting points are about 10 to 15 percent of the wire's breaking load on the cap shrouds, with the lowers somewhat lower, and rarely more than 20 percent. These are general figures. Follow your mast maker's or rigger's tuning guide for your boat.
Do I need a Loos gauge to tune my rig?
Do I need a Loos gauge to tune my rig?
It isn't essential, but it's strongly recommended. A gauge lets you set repeatable, matched tensions on both sides instead of guessing by feel, and it gives you numbers to record. Without one you can still centre the mast and check the leeward shrouds under sail, but you can't easily tell how much tension you're applying.
How do I know if my leeward shrouds are too slack?
How do I know if my leeward shrouds are too slack?
Sail upwind in a moderate breeze and look at the leeward cap shroud. With proper tension it should remain taut at about 15 degrees of heel. If it's visibly slack at that angle, add tension in small equal steps on both sides and check again.
Should I tune the uppers or the lowers first?
Should I tune the uppers or the lowers first?
Most step-by-step guides start with the cap shrouds, to centre the mast, and then bring in the lowers to straighten it. Experienced riggers do disagree on this, so if your mast maker's guide gives a different order, follow that.
How often should I re-tension my rig?
How often should I re-tension my rig?
Check it after stepping the mast, after your first few sails, after heavy weather, and at the start of each season. Temperature changes and wire stretch alter the tension over time, so a log of gauge readings helps you spot drift.
Is tuning different for continuous and discontinuous rigging?
Is tuning different for continuous and discontinuous rigging?
Yes. On a continuous rig each shroud runs from deck to mast, so you centre the mast with the cap shrouds and then bring in the lowers. On a discontinuous rig the segments interact, so makers advise leaving the diagonals loose, tensioning the verticals first and working up, rechecking the mast after each step. Follow your mast maker's guide.
Recent Articles


-
Downeaster 32 Review, Specs & Bluewater Cruising Guide
Nov 20, 26 05:55 PM
Detailed Downeaster 32 review covering specs, performance, construction, common problems, bluewater capability and buying advice. -
Swage or Mechanical Rigging Terminals? Spot Failure Early
Nov 20, 26 04:06 PM
Swage terminals can crack out of sight. Learn the warning signs, how dye testing helps, and when Sta-Lok or Norseman fittings are the better choice. -
Wauquiez Pilot Saloon 60 Review, Specs & Bluewater Buying Guide
Nov 20, 26 09:01 AM
Detailed Wauquiez Pilot Saloon 60 review covering specs, performance, seaworthiness, ownership, buyer checks and bluewater cruising suitability.